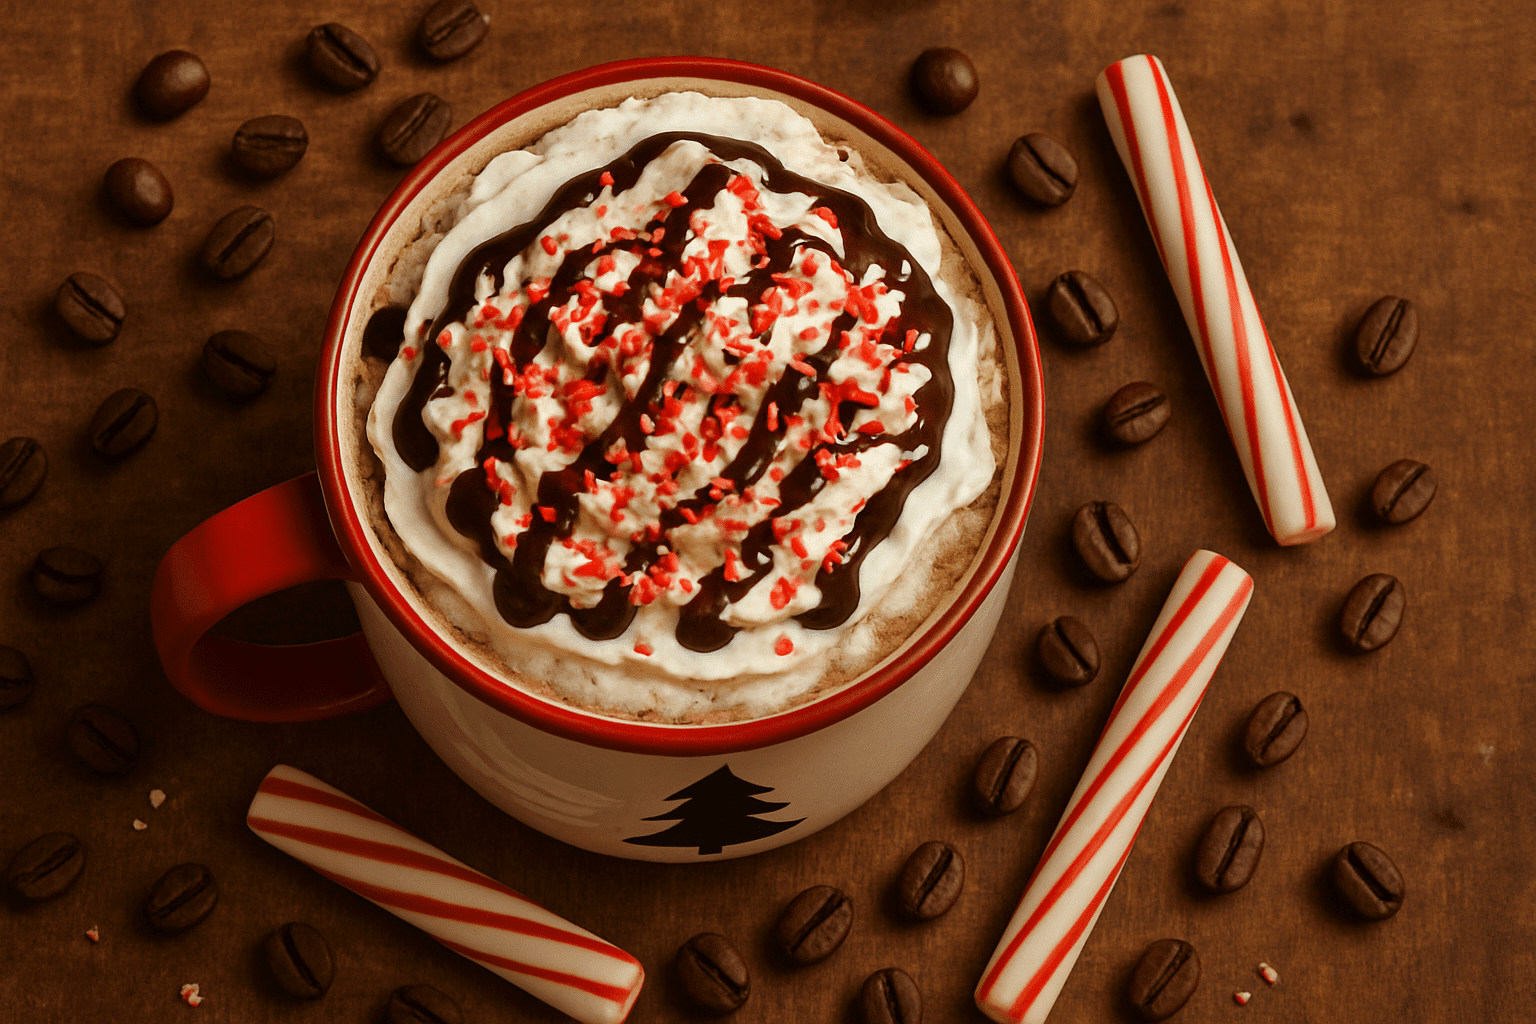
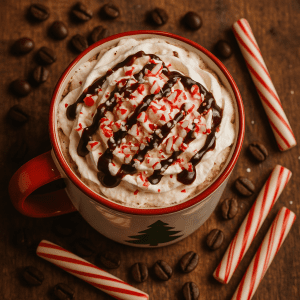
There’s something magical about sipping a warm peppermint mocha on a cold winter morning. The mix of rich chocolate, cool mint, and bold coffee feels like a hug in a mug. But here’s the truth: you don’t need to spend $6 at a coffee shop to enjoy this festive treat. Making a homemade peppermint mocha is easier than you think—and way cheaper too.
I remember my first attempt at a DIY peppermint mocha. I was tired of the long lines and high prices during the holiday rush. So I grabbed some cocoa powder, peppermint extract, and my trusty coffee maker. Within 10 minutes, I had a steaming cup that tasted just as good as the café version. Maybe even better, because I could make it exactly how I liked it.
This peppermint mocha recipe will save you money, time, and stress. Plus, you can enjoy this cozy winter beverage any time you want—not just during the holiday season. Let’s dive in and make your new favorite Christmas mocha coffee together.
What Makes a Peppermint Mocha Special?
A peppermint mocha is basically a hug from the holiday season. It combines four simple things: coffee, chocolate, mint, and cream. The result? A festive mocha that tastes like Christmas in a cup.
The drink starts with strong coffee or espresso. Then you add chocolate—usually cocoa powder or chocolate syrup. The peppermint comes next, either from syrup or extract. Finally, you top it with steamed milk and whipped cream. Some people add crushed candy cane on top for extra holiday vibes.
What makes this peppermint coffee so special is how the flavors work together. The chocolate makes the coffee smooth and sweet. The mint adds a cool, refreshing kick. And the cream ties it all together with rich, velvety goodness.
This holiday coffee drink became super popular when Starbucks added it to their menu back in 2002. They wanted to create something that felt festive but wasn’t too scary for people new to espresso drinks. The peppermint chocolate coffee combo was an instant hit. Now it’s a winter tradition for millions of people.
Why Make Peppermint Mocha at Home?
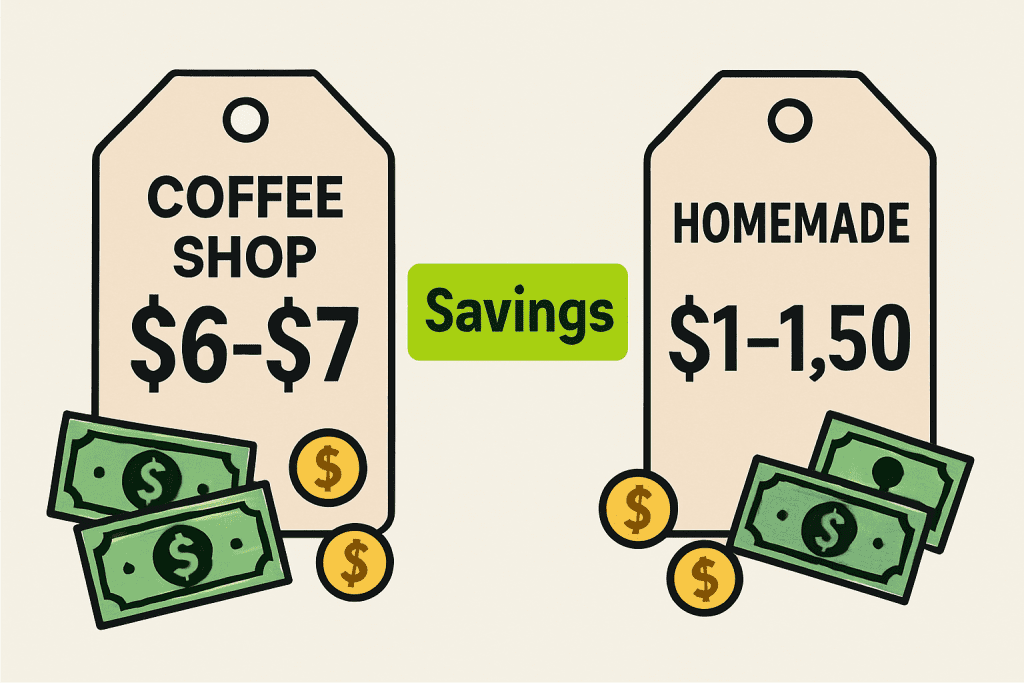
Let’s talk money first. A tall peppermint mocha at Starbucks costs about $6 to $7 after tax. If you buy one twice a week during the holiday season, that’s over $300. Ouch.
But when you make peppermint mocha at home, each cup costs less than $1.50. You’ll spend maybe $0.25 on coffee, $0.40 on milk, $0.15 on chocolate, and $0.10 on peppermint. The math is simple: homemade saves you serious cash.
There’s more to it than just money, though. When you make your own peppermint mocha latte, you control everything. Want less sugar? Done. Prefer oat milk? Easy. Need it extra minty? Go for it. You’re the boss of your own festive coffee bar.
Making this easy holiday mocha recipe at home also means you can enjoy it year-round. Coffee shops only offer it seasonally, but you can whip up this Christmas morning drink whenever the mood strikes. July heatwave? Make it iced. Cozy December evening? Serve it hot.
Plus, there’s something satisfying about making homemade café recipes. You’ll feel like a barista, and your kitchen will smell amazing. It’s a win-win.
Essential Ingredients for Your Peppermint Mocha Recipe
Let’s break down what you need to make peppermint mocha at home. The good news? You probably have most of these things already.
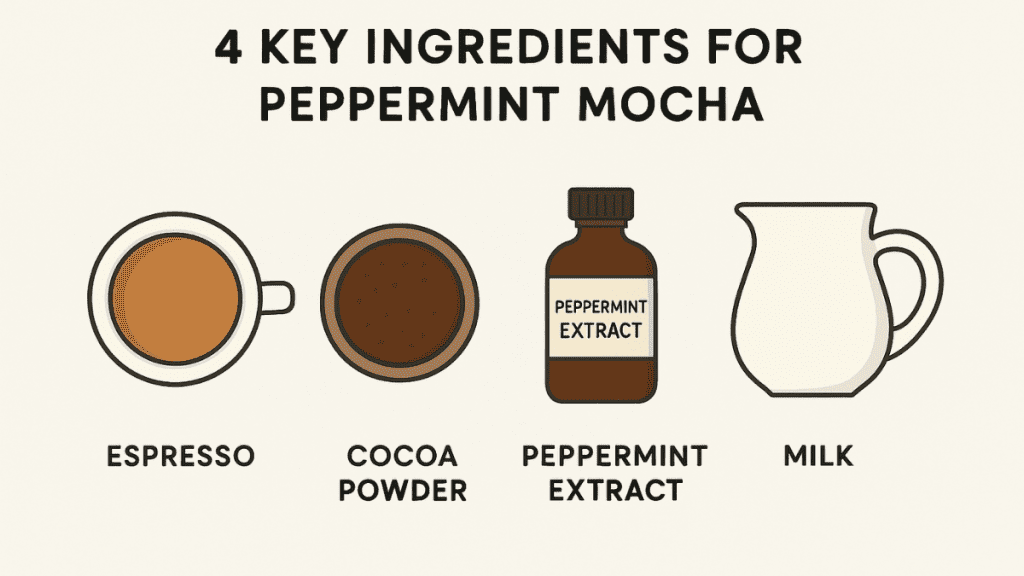
Coffee or Espresso
Start with strong coffee. You need about 4 to 6 ounces per drink. Regular drip coffee works fine if you brew it strong. Or pull two shots of espresso if you have an espresso machine. Even instant espresso powder dissolved in hot water will do the trick. The key is making it bold enough to stand up to the chocolate and mint.
Chocolate Component
This is what makes it a “mocha” instead of just a peppermint latte. You have options here. Cocoa powder is the easiest—just mix 1 to 2 tablespoons with a bit of hot water and sugar. Chocolate syrup works too. Some people use melted chocolate chips for extra richness. If you’re vegan, grab dairy-free chocolate.
Peppermint Flavoring
This is where the magic happens. Peppermint extract is the strongest option. Start with just 1/8 teaspoon and add more if needed. Too much tastes like mouthwash—trust me on this. Peppermint syrup is milder and adds sweetness at the same time. You’ll need 2 to 3 tablespoons. Or crush up candy canes and stir them in while the drink is hot.
Milk
Any milk works for this peppermint mocha recipe. Whole milk makes it extra creamy. Two percent is a nice balance. Skim milk is lighter. Or go dairy-free with oat, almond, or coconut milk. Oat milk froths really well and adds a touch of natural sweetness.
Sweetener
Regular white sugar is fine. You’ll need 1 to 2 tablespoons. Maple syrup and honey work too. Want to keep it sugar-free? Use stevia or monk fruit sweetener instead.
Toppings
This is the fun part. Whipped cream is classic. Add crushed candy canes for crunch and color. Drizzle chocolate sauce on top. Dust with cocoa powder. Get creative and make it Instagram-worthy.
Kitchen Tools You’ll Need
Making a Starbucks peppermint mocha copycat doesn’t require fancy equipment. Here’s what helps:
Must-Have Tools:
Nice-to-Have Tools:
If you don’t have a frother, no worries. Pour hot milk into a jar with a lid and shake it hard for 30 seconds. It won’t be perfect, but you’ll get some foam. Or just heat the milk and skip the foam entirely. Your DIY peppermint mocha will still taste great.
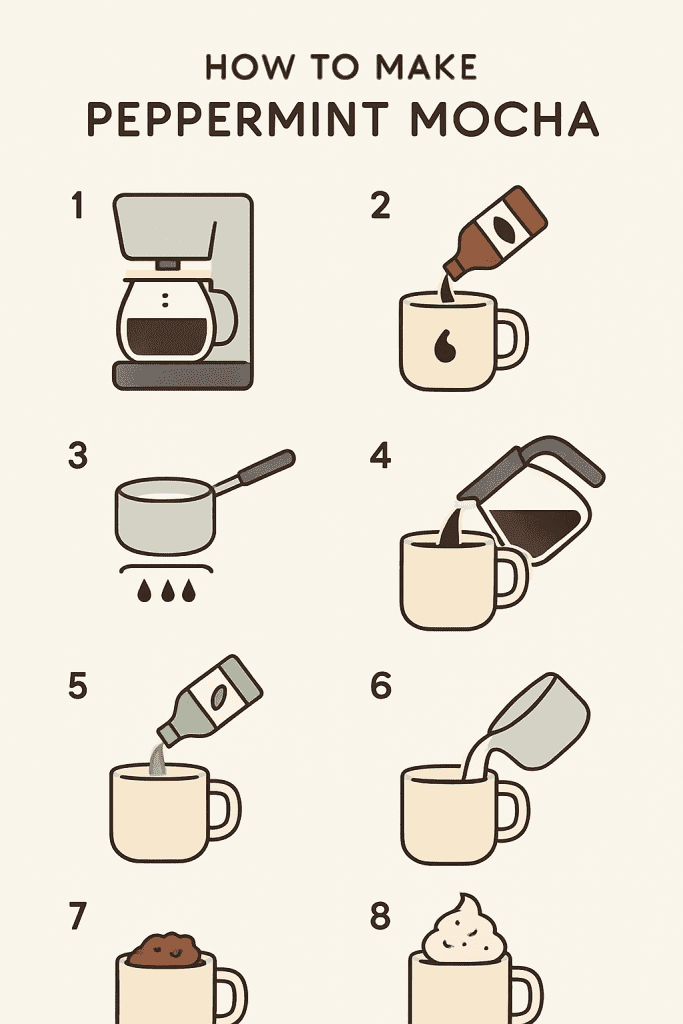
Step-by-Step: How to Make Peppermint Mocha at Home
Ready to become your own barista? Follow these simple steps. This recipe makes one 12 to 16 ounce drink.
Step 1: Brew Your Coffee
Make 4 to 6 ounces of strong coffee or pull 2 shots of espresso. If you’re using regular drip coffee, brew it twice as strong as usual. The bold coffee flavor needs to shine through the chocolate and mint.
Step 2: Make the Chocolate Mixture
While your coffee brews, grab a mug. Add 1 to 2 tablespoons of cocoa powder, 1 to 2 tablespoons of sugar, and 2 to 3 tablespoons of hot water. Whisk it together until it’s smooth and silky. No lumps allowed. This creates a rich chocolate base that blends easily.
Step 3: Heat and Froth Your Milk
Pour 8 ounces of milk into a small pot. Heat it over medium heat until it’s steaming but not boiling. You want it around 140 to 160 degrees. If it boils, it won’t froth well and might taste burnt. Once it’s hot, use your frother to create some foam. Or do the jar-shaking method I mentioned earlier.
Step 4: Combine Coffee and Chocolate
Pour your hot coffee into the mug with the chocolate mixture. Stir well until everything dissolves completely. The chocolate should melt right into the coffee.
Step 5: Add the Peppermint
Here’s the critical part. Add just 1/8 teaspoon of peppermint extract. Stir and taste. Need more? Add another tiny bit. It’s way easier to add more than to fix a too-minty drink. If you’re using peppermint syrup instead, start with 2 tablespoons.
Step 6: Pour in the Frothed Milk
Gently pour your hot, frothed milk over the coffee mixture. Hold back the foam with a spoon so it goes on last. This creates pretty layers if you’re using a clear mug.
Step 7: Add the Toppings
Top with whipped cream. Sprinkle crushed candy cane on top. Add a chocolate drizzle if you’re feeling fancy. Stick a whole candy cane in there as a stirrer.
That’s it. You just made a homemade peppermint mocha that tastes like it came from a fancy coffee shop. The whole process takes about 10 minutes once you get the hang of it.
Pro Tips for the Perfect Peppermint Mocha
Want your easy holiday mocha recipe to turn out amazing every time? Here are some tricks I’ve learned.
Dissolve the chocolate first. Don’t just dump cocoa powder into hot coffee. It’ll clump up and float on top. Mix it with sugar and a little hot water first to make a smooth paste.
Don’t over-mint it. Start small with peppermint extract. You can always add more, but you can’t take it out. Too much tastes like toothpaste instead of a cozy winter beverage.
Use fresh ingredients. Old cocoa powder tastes flat. Fresh peppermint extract is more vibrant. Good coffee beans make a huge difference.
Layer for looks. Pour slowly to create those pretty layers. The chocolate sinks, the coffee sits in the middle, and the foam floats on top. Perfect for photos.
Warm your mug first. Fill it with hot water while you make the drink. Dump the water out right before you add the coffee. This keeps your peppermint mocha latte hot longer.
Froth cold milk. Use milk straight from the fridge. Cold milk creates better foam than room temperature milk. Heat it, then froth it—not the other way around.
How to Make Your Own Peppermint Syrup and Mocha Sauce
Want to go full homemade? Make your own syrups. They taste fresher and cost way less than store-bought versions.
Homemade Peppermint Syrup
This is super easy. You need 1 cup of water, 1 cup of sugar, and 1/2 teaspoon of peppermint extract.
Pour the water and sugar into a small pot. Heat it over medium-high heat. Stir until the sugar dissolves completely. Let it boil for about 1 minute. Turn off the heat and let it cool for 10 minutes. Then stir in the peppermint extract.
Pour it into a clean jar or bottle. Keep it in the fridge. It’ll last 2 to 3 weeks. Use 2 to 3 tablespoons per drink instead of extract.
Homemade Mocha Sauce
This chocolate sauce makes your peppermint chocolate coffee even richer.
Mix 1/2 cup water, 1/2 cup sugar, and 1/3 to 1/2 cup cocoa powder in a pot. Whisk it together. Heat it over medium heat, whisking constantly. Let it simmer for 2 to 5 minutes until it thickens. Take it off the heat and add 1/2 teaspoon vanilla extract.
Store it in the fridge in an airtight container. Use it within 1 week. Mocha sauce goes bad faster than plain syrup, so don’t make huge batches.
Making these syrups yourself saves money and tastes way better. Plus, you can adjust the sweetness to your liking.
Delicious Peppermint Mocha Variations to Try
Once you master the basic peppermint mocha recipe, it’s time to experiment. Here are some fun twists on this festive mocha.
Iced Peppermint Mocha
Perfect for warm days or if you just prefer cold drinks. Make the drink exactly the same way, but skip heating the milk. Pour everything over ice instead. The peppermint flavor tastes even fresher when it’s cold.
Peppermint Mocha Frappuccino
Want a thick, slushy version? Blend cold coffee, milk, ice, chocolate syrup, and peppermint extract in a blender. Add a tiny pinch of xanthan gum if you have it—this makes it extra thick. Blend until smooth and frosty.

Vegan Peppermint Mocha
Use oat milk or almond milk instead of dairy. Pick dairy-free chocolate or cocoa powder. Top with coconut whipped cream. It tastes just as good as the regular version.
Skinny Peppermint Mocha
Cut the calories by using skim milk or unsweetened almond milk. Use sugar-free chocolate syrup and sugar-free peppermint syrup. Skip the whipped cream or use a light version. You’ll save about 200 calories.
White Chocolate Peppermint Mocha
Swap regular chocolate for white chocolate. Use white chocolate syrup or melt white chocolate chips. It’s sweeter and creamier than the classic version.
Peppermint Hot Chocolate
Leave out the coffee entirely. Use extra milk and chocolate instead. This makes a great option for kids or anyone who doesn’t like coffee.
Boozy Peppermint Mocha
Add a shot of crème de menthe, peppermint schnapps, or chocolate liqueur. This turns your Christmas mocha coffee into an adults-only treat. Perfect for holiday parties.
Decaf Version
Use decaf coffee or espresso. Everything else stays the same. Now you can enjoy this peppermint coffee before bed without staying up all night.
Nutrition and Calorie Breakdown
Let’s talk about what’s actually in this holiday coffee drink. The numbers might surprise you.
A grande peppermint mocha from Starbucks has about 440 calories. It also packs 63 grams of carbs and 54 grams of sugar. That’s a lot—basically like eating a candy bar with your coffee.
A tall size (smaller) with whole milk and whipped cream has 350 calories, 48 grams of carbs, and 42 grams of sugar. If you get nonfat milk and skip the whipped cream, it drops to 240 calories and 40 grams of sugar.
But here’s where making peppermint mocha at home really shines. You control the ingredients, so you control the nutrition.
A basic homemade version with 2 percent milk, 1 tablespoon of cocoa powder, 1 tablespoon of sugar, and light whipped cream has about 150 to 200 calories. That’s less than half the calories of the coffee shop version.
Want to go even lighter? Use unsweetened almond milk, skip the whipped cream, and use a sugar substitute. Now you’re down to about 63 to 100 calories.
A vegan peppermint mocha latte made with oat milk and dairy-free chocolate usually has 200 to 250 calories. Still way better than the coffee shop version.
As for caffeine, a peppermint mocha has about 95 to 175 milligrams depending on the size. That’s the same as a regular latte since the caffeine comes from the coffee, not the chocolate or mint.
The best part? You can adjust everything to fit your diet. Need low sugar? Use less. Want more protein? Add protein powder. It’s your drink—make it work for you.
Homemade Peppermint Mocha: Cozy Holiday Coffee Recipe
Equipment
- Small saucepan
- Whisk
- Measuring spoons and cups
- Milk frother (optional)
- Coffee maker or espresso machine
- Your favorite mug
Ingredients
- 2 shots espresso
- 1-2 tbsp cocoa powder
- 1-2 tbsp sugar
- 2-3 tbsp hot water
- 1/8 teaspoon peppermint extract
- 8 oz milk (whole, 2%, or dairy-free)
- Whipped cream and crushed candy canes for topping
Instructions
- Brew 4-6 oz strong coffee or pull 2 espresso shots.
- Whisk cocoa powder, sugar, and hot water in your mug until smooth. No lumps allowed.
- Heat milk in a saucepan to 140-160°F. Froth if you have a frother, or shake in a jar for 30 seconds.
- Pour hot coffee into the chocolate mixture and stir well.
- Add 1/8 teaspoon peppermint extract. Taste first—this is strong! Add more if needed.
- Pour frothed milk over the coffee. Hold back foam with a spoon so it tops the drink.
- Top with whipped cream, crushed candy canes, and chocolate drizzle. Enjoy!
Notes
Cost Breakdown: Homemade vs. Coffee Shop
Here’s where things get really interesting. Let’s crunch the numbers.
A tall peppermint mocha at Starbucks costs $5.25 to $6.19 before tax. After tax and maybe a tip, you’re paying $6 to $7. A grande costs even more—$6.30 to $6.84 plus tax.
Now let’s look at what it costs to make peppermint mocha at home:
Total: About $1.05 per drink. Even if you splurge on fancy ingredients, you’ll spend maybe $1.50.
Let’s say you drink two peppermint mochas a week during the 12-week holiday season. That’s 24 drinks total.
Coffee shop cost: 24 drinks × $6.50 = $156
Homemade cost: 24 drinks × $1.25 = $30
You save: $126 in just one season
Over a year, if you make them whenever you want, the savings get even bigger. You could save $300 to $350 annually. That’s a nice vacation fund, just from skipping the coffee shop line.
The upfront investment is small too. A bottle of peppermint extract costs $5 to $8 and makes 30 or more drinks. A container of cocoa powder costs $5 to $8 and makes 30 or more drinks. You’re basically saving money after your second homemade cup.
Best Milk Options for Peppermint Mocha
The type of milk you use changes everything about your peppermint mocha latte. Let’s break down your options.
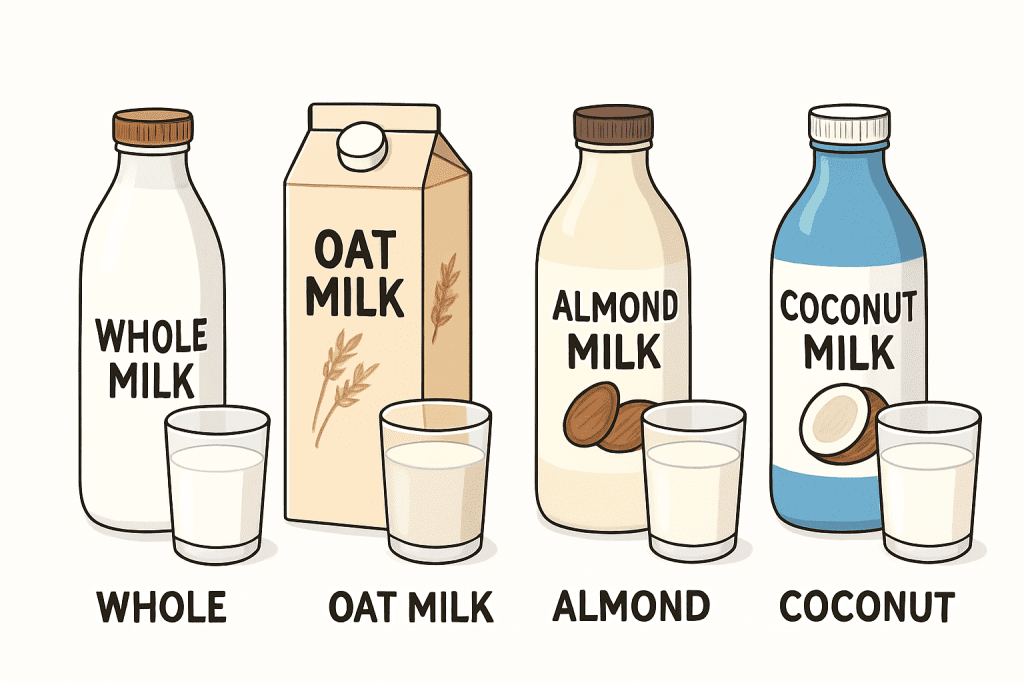
Whole Milk
This is the classic choice. It’s rich, creamy, and froths beautifully. The fat content makes your drink smooth and indulgent. If you want a true Starbucks peppermint mocha copycat, use whole milk.
2% Milk
A good middle ground. You get decent creaminess without quite as many calories. It still froths pretty well. This is what I use most of the time.
Skim Milk
The lightest dairy option. It saves you calories but tastes a bit watery. The foam isn’t as stable either. But if you’re watching your fat intake, it works fine.
Oat Milk
The best dairy-free option for this festive mocha. It’s naturally sweet, which means you can use less sugar. It froths almost as well as dairy milk. The texture is creamy and rich. This is my top pick for non-dairy peppermint mochas.
Almond Milk
Light and slightly nutty. It’s low in calories—usually only 30 to 60 per cup. It doesn’t froth as well as oat milk, but it still works. Some people love the subtle almond flavor with the peppermint.
Soy Milk
Creamy and smooth. It has more protein than most plant milks. Some brands have a slight vanilla flavor that actually enhances the drink. It froths reasonably well too.
Coconut Milk
Adds a tropical twist. It’s rich and creamy but definitely tastes like coconut. If you like that flavor with chocolate and mint, go for it. If not, pick something else.
Cashew Milk
Very mild and neutral. It’s creamy but not as thick as oat or coconut milk. It’s a good option if you want something that won’t change the flavor profile much.
For the best froth, use cold milk straight from the fridge. Heat it gently—don’t boil it. And remember: whole milk and oat milk give you the prettiest, most stable foam. But honestly, any milk tastes great in this easy holiday mocha recipe.
Common Mistakes and How to Fix Them
Even simple recipes can go wrong. Here are the problems I see most often, plus how to fix them.
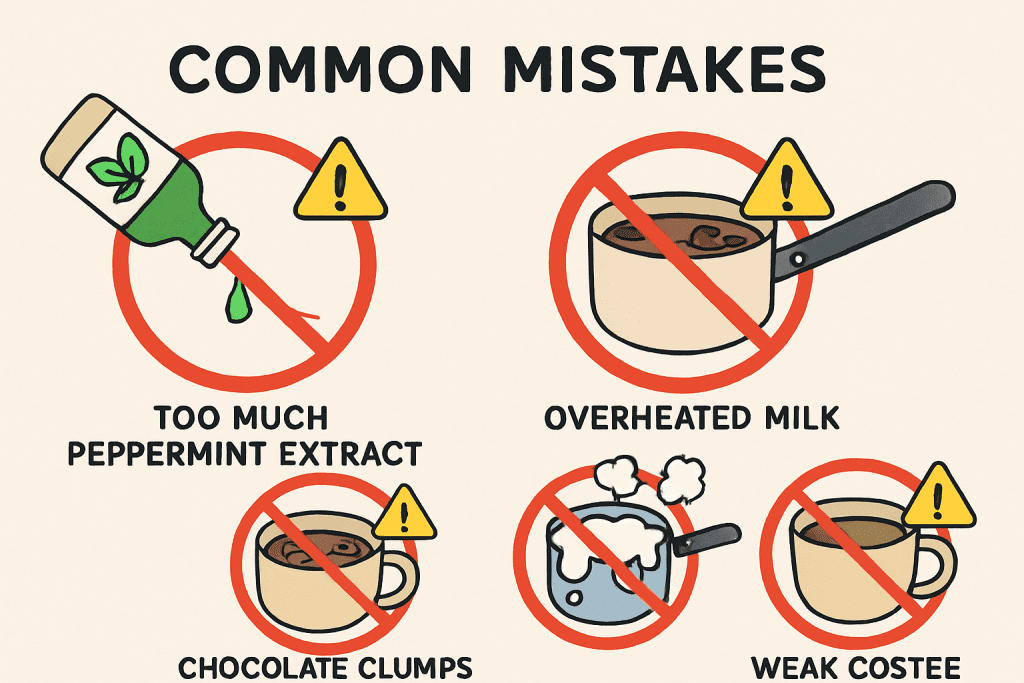
Mistake 1: Too Minty
If your drink tastes like mouthwash, you added too much peppermint. The fix? Add more coffee or milk to dilute it. Next time, start with just a tiny drop of extract—seriously, 1/8 teaspoon is enough.
Mistake 2: Not Sweet Enough
Peppermint flavor doesn’t add sweetness—it just adds mint. If your drink tastes bitter, add more sugar or a splash of vanilla syrup. Don’t try to fix it with more peppermint. That makes it worse.
Mistake 3: Chocolate Clumps
If you dump cocoa powder straight into hot coffee, it clumps and floats. Always mix cocoa with sugar and hot water first. Whisk it into a smooth paste. Then add it to your coffee. Problem solved.
Mistake 4: Milk Won’t Froth
Use fresh, cold milk. Heat it to 140 to 160 degrees—not boiling. If it’s too hot, it won’t froth. If your milk is old or the fat content is too low, it also won’t froth well. Whole milk and oat milk work best.
Mistake 5: Weak Coffee Flavor
If the chocolate and milk drown out the coffee, you need stronger coffee. Use more coffee grounds or add an extra shot of espresso. The coffee should be the star—chocolate and mint are just supporting actors.
Mistake 6: Grainy Texture
This happens when sugar doesn’t dissolve fully. Make sure you dissolve the sugar in hot liquid before adding cold milk. Stir well at every step.
Mistake 7: Wrong Proportions
A standard peppermint mocha uses about 2 shots of espresso (or 4 to 6 ounces of strong coffee) with 8 ounces of milk. If your ratios are off, it won’t taste right. More milk makes it taste like hot chocolate. More coffee makes it too bitter. Balance is key.
Storage and Make-Ahead Tips
Can you make peppermint mocha ahead of time? Sort of. Here’s what works and what doesn’t.
The Finished Drink
A fully made peppermint mocha doesn’t store well. You can refrigerate it for up to 24 hours in an airtight container. Reheat it gently in the microwave for 1 to 2 minutes, stirring halfway through. But honestly, it tastes way better fresh. The milk separates and the foam disappears.
Peppermint Syrup
This stores great. Make a big batch and keep it in an airtight jar in the fridge. It lasts 2 to 3 weeks easily. This is the best make-ahead strategy. When you want a drink, just grab the syrup and you’re halfway done.
Mocha Sauce
Homemade chocolate mocha sauce lasts about 1 week in the fridge. Keep it in an airtight container. It goes bad faster than plain syrup because of the cocoa, so don’t make huge batches.
Coffee Ice Cubes
Here’s a smart trick for iced peppermint mochas. Brew extra coffee and freeze it in ice cube trays. When you want an iced version, use coffee ice cubes instead of regular ice. Your drink won’t get watered down.
Batch Prep
Make your syrups on Sunday. Store them in the fridge. Measure out individual servings of cocoa powder and sugar into small containers or bags. In the morning, you just need to brew coffee and heat milk. You’ll have your homemade peppermint mocha ready in 3 minutes.
Whipped Cream
Fresh whipped cream tastes best, but you can freeze dollops on a baking sheet and then store them in a freezer bag. Grab one when you need it. It’ll thaw in a couple minutes on top of your hot drink.
The bottom line? Make the syrups ahead. Make the drink fresh. Your cozy winter beverage will taste amazing every time.
Enjoy Peppermint Mocha Year-Round
Here’s a secret most people don’t know: you can get peppermint mocha any time of year. It’s not just a Christmas mocha coffee.
Starbucks keeps peppermint syrup and mocha sauce in stock all year long. They just don’t advertise it. You can order a peppermint mocha in July if you want. You won’t get the fancy chocolate curls on top, but the drink itself is available.
But why bother with the coffee shop when you can make peppermint mocha at home whenever you want? I make iced versions all summer long. The cool mint and chocolate taste amazing when it’s hot outside.
There’s no rule that says peppermint chocolate coffee is only for December. If you want it in March, make it. Craving it on a random Tuesday in October? Go for it. This is your festive coffee bar, and you make the rules.
The best part is you’re not stuck with seasonal availability. No more waiting until November. No more panic when the holiday menu ends in January. You have total freedom.
I keep peppermint extract and cocoa powder in my pantry all year. When the mood strikes, I whip up this easy holiday mocha recipe in 10 minutes. It makes any day feel a little more special.
Hot, Iced, or Blended: Which Version is Right for You?
Your peppermint mocha latte can come in three different forms. Each one has its own vibe.
Hot Peppermint Mocha
This is the classic. It’s what you picture when someone says “holiday coffee drink.” It’s perfect for cold weather, cozy mornings, or when you need to warm up fast. The hot version emphasizes the coffee and chocolate flavors. The mint adds a refreshing finish. Making it takes about 5 to 10 minutes.
Iced Peppermint Mocha
Pour everything over ice and use cold milk instead of hot. This version is super refreshing. It’s great for summer or if you prefer cold drinks year-round. The flavors taste brighter and more vibrant when it’s iced. The mint really pops. It’s also faster to make—only 3 to 5 minutes since you skip the heating step.
Peppermint Mocha Frappuccino
This is the most indulgent version. Blend coffee, milk, ice, chocolate, and peppermint until it’s thick and frosty. It’s more like a dessert than a drink. Kids love it. It’s perfect for hot days when you want something sweet and cold. Takes about 5 to 7 minutes including cleanup.
Here’s how to choose:
I keep it hot from November through February. I switch to iced from March through October. And I make frappuccinos when I’m in the mood for something extra special.
All three versions use the same basic ingredients. You just change the temperature and preparation method. Easy peasy.
Make It Instagram-Worthy: Topping Ideas
Want your peppermint mocha to look as good as it tastes? Let’s talk toppings and presentation.
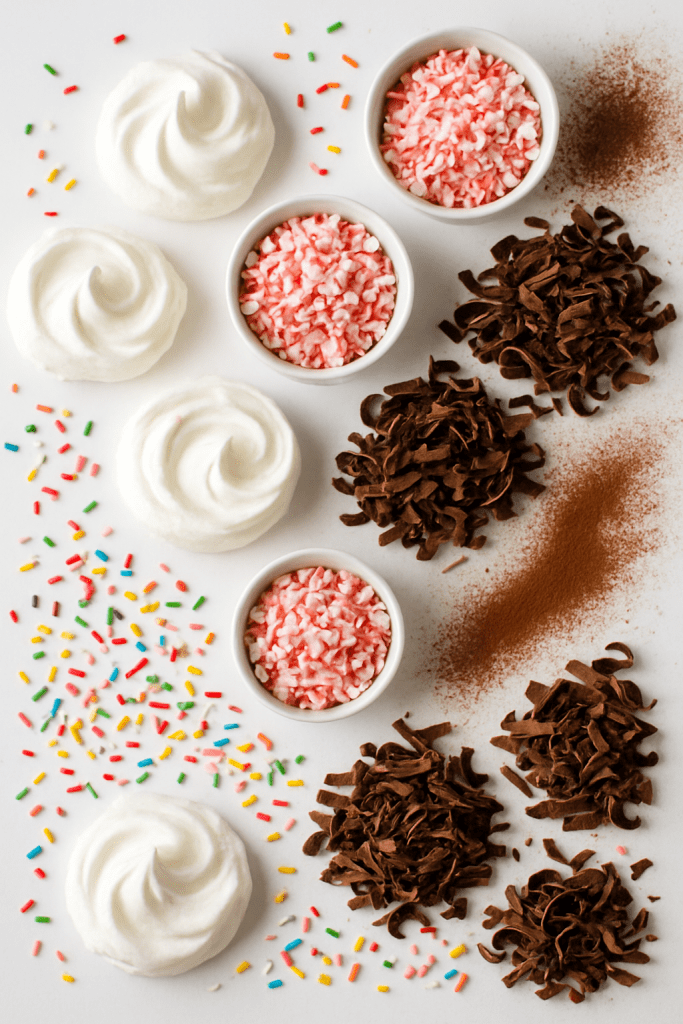
Classic Combo
Top with whipped cream, crushed candy canes, and chocolate shavings. This is the look everyone recognizes. It screams “holiday” and photographs beautifully.
Elegant Style
Dust the top with cocoa powder. Add a light drizzle of chocolate sauce. Stick a whole candy cane in as a stirrer. Simple, classy, and still festive.
Over-the-Top Festive
Go wild. Add whipped cream, red and green sprinkles, chocolate curls, a drizzle of both chocolate and caramel, and two candy canes. It looks like Christmas exploded in your mug. Perfect for special occasions.
Gourmet Touch
Make peppermint whipped cream by adding a drop of extract to regular whipped cream. Pipe it on top in a fancy swirl. Drizzle chocolate sauce on the inside of your mug before adding the drink. When you pour, the chocolate creates pretty streaks. Very café-style.
Minimalist
Just a simple layer of microfoam on top with a light dusting of cocoa. Clean, modern, and lets the drink shine.
Extra Indulgent
Double whipped cream. Marshmallows. Chocolate chips. Crushed cookies. More is more.
For the best photos, use a clear glass mug so you can see the layers. Make sure your lighting is good. Natural light near a window works great. Put your drink on a festive surface—a wooden board, a holiday placemat, or next to some pine branches.
The garnish isn’t just for looks. It adds texture and extra flavor. Each sip gets a little bit of everything.
Expert Tips for Café-Quality Results
Want your DIY peppermint mocha to taste like it came from a professional barista? Here are some insider tricks.
Use Fresh Espresso
If you have an espresso machine, use it. Fresh-pulled espresso tastes way better than instant coffee or even strong drip coffee. The crema on top adds richness. If you don’t have an espresso machine, a Moka pot is the next best thing.
Get the Milk Temperature Right
Steam or heat your milk to 140 to 160 degrees. Any hotter and it tastes burnt. Any cooler and it won’t blend well. If you don’t have a thermometer, heat until it’s steaming but not bubbling.
Layer Your Ingredients
Add things in the right order: syrups first, then espresso, then milk. This helps everything mix properly and creates those pretty layers in clear mugs.
Create Microfoam
Real baristas make tiny, velvety bubbles called microfoam. To get this at home, froth your milk right after heating it. Move the frother up and down slowly. You want foam that looks like wet paint, not big airy bubbles like a bubble bath.
Pre-Warm Your Mug
Fill your mug with hot water while you make the drink. Dump it out right before you add the peppermint mocha. This keeps your drink hot longer and helps preserve the foam.
Use Quality Ingredients
Good coffee beans make a huge difference. Fresh peppermint extract is more vibrant than old extract. Real vanilla extract beats imitation. You don’t need to spend a fortune, but don’t buy the cheapest stuff either.
Perfect Your Ratios
Most coffee drinks use a 2:1 milk-to-coffee ratio. For a 12-ounce drink, that’s 8 ounces of milk and 4 ounces of coffee. This creates the right balance.
Add Chocolate Sauce to the Cup First
Drizzle chocolate sauce on the inside of your mug before pouring the drink. As you pour, it creates beautiful streaks down the sides. Very professional looking.
Don’t Overmix
Stir gently. If you stir too hard, you’ll destroy the foam and lose the layered look.
These small details add up. Your homemade peppermint mocha will taste and look just as good as any café version—maybe even better.
Peppermint Mocha for Special Diets
Everyone should get to enjoy this festive mocha, no matter their dietary needs. Here’s how to adapt the recipe.
Vegan Peppermint Mocha
Use plant-based milk like oat or almond milk. Choose dairy-free chocolate or regular cocoa powder (most cocoa powder is vegan). Top with coconut whipped cream instead of dairy whipped cream. It tastes just as rich and delicious.
Keto/Low-Carb Version
Use heavy cream instead of milk, or use half cream and half unsweetened almond milk. Sweeten with stevia, erythritol, or monk fruit sweetener instead of sugar. Use sugar-free chocolate syrup. Skip the candy cane topping. This brings the carbs way down.
Paleo Peppermint Mocha
Use coconut milk and coconut sugar. Stick with pure cocoa powder. Make sure your peppermint extract doesn’t have weird additives. This version is naturally dairy-free and refined-sugar-free.
Gluten-Free
Good news: this drink is naturally gluten-free. Coffee, chocolate, peppermint, and milk don’t contain gluten. Just double-check your extract and syrup labels to make sure no gluten snuck in during processing.
Lactose-Intolerant
Use lactose-free milk or any plant-based milk. Everything else stays the same. Problem solved.
Diabetic-Friendly
Use sugar-free chocolate syrup and sugar-free sweetener. Choose skim milk or unsweetened almond milk to keep carbs lower. A standard peppermint mocha has 40 to 63 grams of carbs, but a sugar-free version has only 10 to 15 grams.
Lower Calorie
Use skim milk or unsweetened almond milk. Skip the whipped cream or use a light version. Use sugar-free syrups. This brings a 440-calorie drink down to about 100 to 150 calories.
The great thing about making peppermint mocha at home is you can customize everything. Don’t let dietary restrictions stop you from enjoying this cozy winter beverage.
The Story Behind Peppermint Mocha
Every great recipe has a story. This one is pretty interesting.
Starbucks introduced the peppermint mocha in 2002. Before that, they already had the Eggnog Latte (since 1986) and the Gingerbread Latte (since 2000). But they wanted something that would appeal to even more people.
Peter Dukes, a product manager at Starbucks, came up with the idea. He wanted to create a drink that felt festive but wasn’t too scary for people who were new to espresso. Peppermint and chocolate are flavors everyone knows and loves, especially during the holidays.
The combination was perfect. The drink became an instant hit. People loved how it captured the feeling of Christmas without being too complicated. It tasted like a candy cane and a chocolate bar had a baby with a coffee drink.
The peppermint mocha helped spark a whole trend of seasonal specialty coffee drinks. Now every coffee shop has holiday menus. But Starbucks’ version is still the most famous.
The drink has become a cultural icon. People associate it with red holiday cups, cozy sweaters, and the start of the winter season. Some coffee lovers wait all year for peppermint mocha season to arrive.
But here’s the thing: you don’t have to wait. When you know how to make peppermint mocha at home, every day can be peppermint mocha day. You’re not bound by seasonal menus or coffee shop hours. You control your own holiday coffee drink destiny.
Frequently Asked Questions
Let’s answer the most common questions about this peppermint mocha recipe.
Can I use peppermint syrup instead of extract?
Yes. Peppermint syrup is milder than extract, so you need more of it. Use 2 to 3 tablespoons of syrup instead of 1/8 teaspoon of extract. Keep in mind that syrup adds sweetness and liquid, so you might need less sugar and slightly less milk.
How do I make peppermint mocha without an espresso machine?
No problem. Brew very strong coffee—use twice as much coffee grounds as normal. Or use a French press for a bold, rich brew. A Moka pot also works great. Even instant espresso powder dissolved in hot water will do the job. The key is making the coffee strong enough to stand up to the chocolate and milk.
What’s the difference between peppermint mocha and peppermint latte?
The chocolate. A peppermint latte is just coffee, milk, and peppermint. A peppermint mocha adds chocolate or cocoa, which makes it richer and sweeter. The mocha is definitely the more indulgent option.
Can I make this ahead of time?
The syrups, yes. Make peppermint syrup and store it for 2 to 3 weeks in the fridge. Make mocha sauce and use it within 1 week. But the finished drink tastes best when it’s fresh. You can refrigerate a prepared drink for up to 24 hours, but it won’t be quite as good when you reheat it.
Why does my homemade version taste different from Starbucks?
Ratios matter. Starbucks uses 4 pumps of mocha sauce and 4 pumps of peppermint syrup in a grande. Each pump is about half a tablespoon. They also use specific branded syrups. Adjust your sweetness, chocolate, and mint levels until you find what tastes right to you. That’s the beauty of making it yourself.
Is peppermint mocha available year-round?
At Starbucks, technically yes. They keep the ingredients in stock all year, so you can order it even in summer. But it’s not on the menu outside of holiday season, and you won’t get the seasonal toppings. When you make peppermint mocha at home, you can have it whenever you want with all the toppings.
How much caffeine is in peppermint mocha?
About 95 to 175 milligrams depending on the size and how many espresso shots you use. That’s the same as a regular latte. The caffeine comes from the coffee, not the chocolate or mint. If you want less caffeine, use decaf coffee.
Can I make this sugar-free?
Absolutely. Use sugar-free chocolate syrup and either sugar-free peppermint syrup or peppermint extract with a sugar-free sweetener like stevia. You’ll cut most of the sugar without losing the flavor.
What milk froths best?
Whole milk creates the best, most stable foam. For dairy-free options, oat milk is the clear winner. It froths almost as well as whole milk and tastes great. Almond and soy milk work okay but don’t create quite as much foam.
How long does mocha sauce last?
About 1 week in the fridge, stored in an airtight container. It goes bad faster than plain simple syrup because of the cocoa. If it starts to smell off or look separated, throw it out and make fresh.
Your New Year-Round Tradition
You made it. You now know everything you need to make an amazing homemade peppermint mocha.
Let’s recap the best parts. You’ll save $5 to $6 per drink compared to buying it at a coffee shop. Over a season, that’s hundreds of dollars back in your pocket. You control every ingredient, so you can make it as sweet, minty, or chocolatey as you like. You can enjoy this festive mocha any time of year, not just during the holidays.
The recipe itself is simple. Brew strong coffee. Mix chocolate and sugar. Heat and froth milk. Add peppermint carefully. Top with whipped cream and crushed candy canes. The whole thing takes about 10 minutes once you get the hang of it.
Try the variations too. Make it iced in summer. Blend it into a frappuccino for a special treat. Go vegan, keto, or sugar-free based on your needs. This peppermint chocolate coffee adapts to whatever you want.
The best part? Making this easy holiday mocha recipe at home turns your kitchen into your own festive coffee bar. No lines. No spelling your name. No paying $7 for a drink that costs $1 to make.
So grab your ingredients and give it a try. Whether it’s a cold December morning or a random Tuesday in April, you deserve a cozy peppermint mocha made just the way you like it. Save this recipe. Pin it for later. And enjoy your new favorite Christmas morning drink—or any-morning drink.
Now go make yourself something delicious. You’ve earned it.