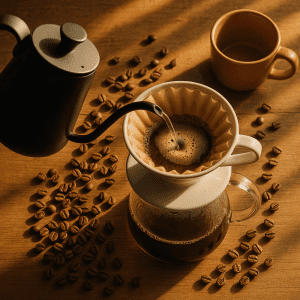
I used to think coffee was just coffee. Boy, was I wrong. My first taste of pour-over coffee happened on a rainy Sunday morning when my coffee maker died. Desperate for caffeine, I borrowed my neighbour’s V60 dripper. That first sip changed everything.
That creamy, bright cup with notes of chocolate and berries? It came from the same beans I used in my old machine. The difference was the manual brewing method. Now, three years later, making pour-over coffee has become my daily ritual.
Why Pour Over Coffee Beats Your Regular Machine
Pour-over coffee gives you control. Your regular coffee dripper machine makes choices for you. Water temp? Fixed. Pour speed? One setting. Brew time? Whatever it wants.
Manual brewing lets you be the boss. You control water temperature, grind size, and timing. This means better flavour extraction and a cup that tastes exactly how you like it.
Here’s what happens with pour-over coffee step-by-step:
Essential Equipment for Making Coffee Without a Coffee Maker
You don’t need fancy gear to start making coffee at home. I began with $30 worth of equipment. Three years later, I still use the same basic setup.
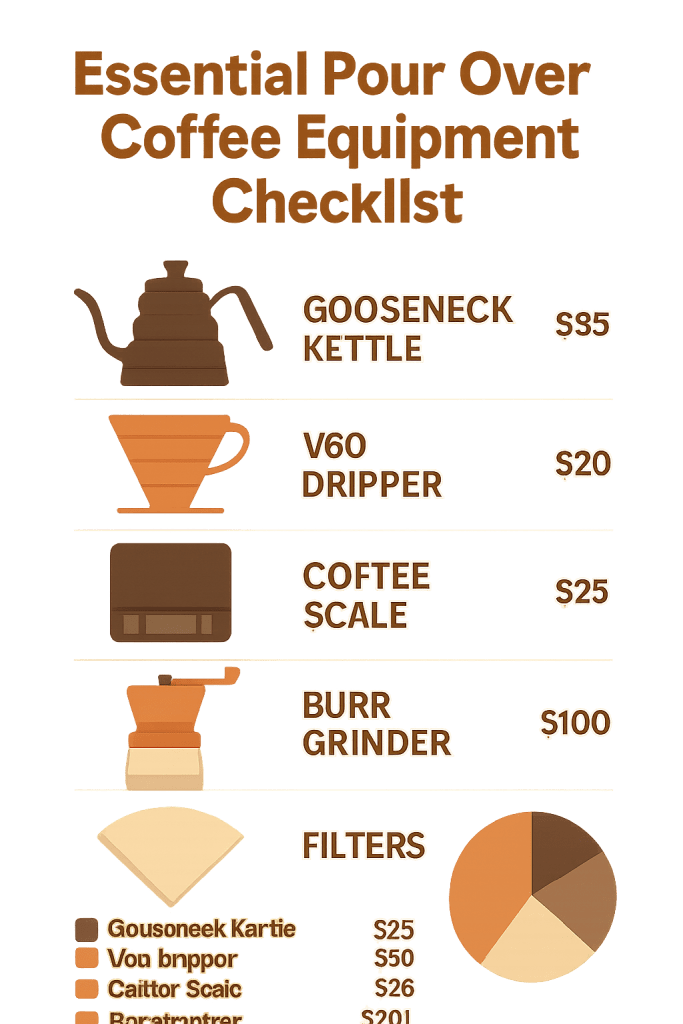
Essential equipment for making pour over coffee at home
Must-Have Equipment:
Budget Setup Total: $110-185
For a DIY coffee station, use a small corner of your counter. I mounted a shelf above my kettle and stored filters in a mason jar. Simple and clean.
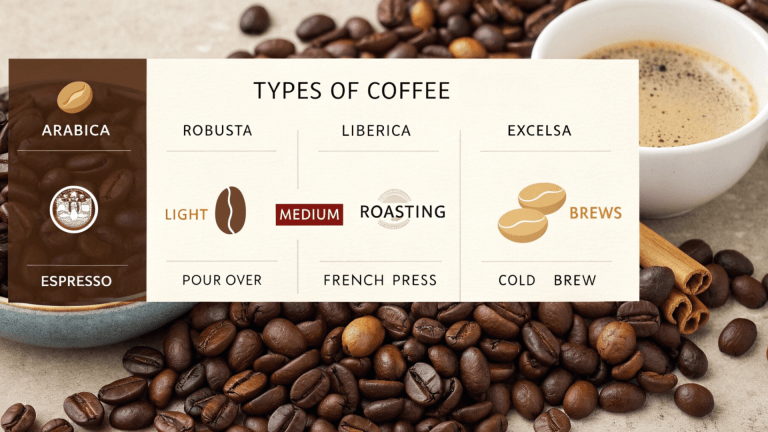
Choosing Coffee Beans for Pour Over
Not all coffee beans work well for pour-over coffee. I learned this the hard way when my first Ethiopian beans tasted like sour fruit water.
Best Beans for Beginners:
Light roasts work great once you nail your technique. They show off complex flavors that your old machine couldn’t extract. Dark roasts can taste bitter, so save those for other methods.
Buy beans roasted within 2 weeks. Fresh coffee beans bloom better during brewing. This bloom phase is crucial for even flavor extraction.
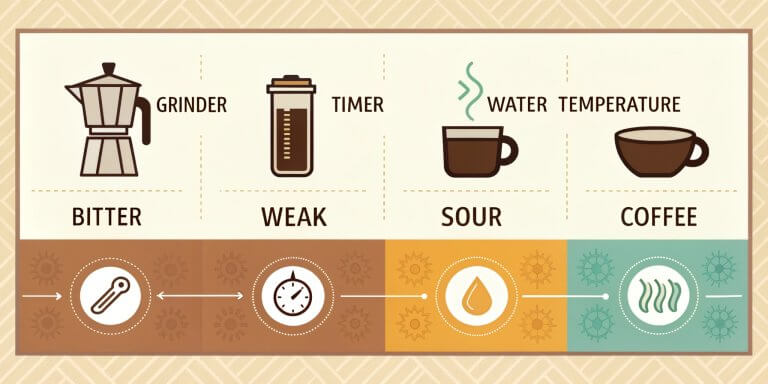
Getting Your Grind Size Right
Grind size makes or breaks your cup. Too fine? Bitter, over-extracted mess. Too coarse? Weak, sour disappointment.
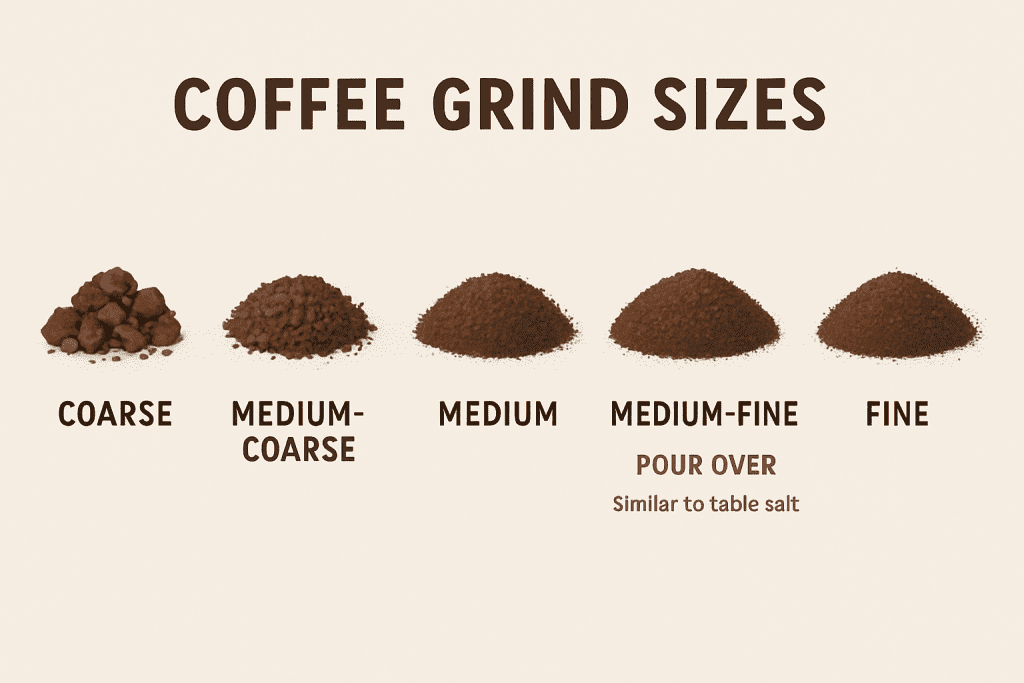
Perfect grind size guide for pour over coffee
For pour-over coffee, aim for medium-fine. Think table salt texture. Your coffee should brew in 3-4 minutes total.
Quick Grind Test:
I keep a brewing log on my phone. Notes like “grind 6.5, 3:15 total time, perfect” help me stay consistent.
Water Temperature and Quality Matter
Water temperature controls extraction speed. I learned this when my coffee tasted flat for weeks. Turns out my kettle ran too cool.
Temperature Guide:
No thermometer? Boil water, then wait 30 seconds. This gets you close to 200°F for most beans.
Use filtered water. Hard water makes bitter coffee. Soft water makes weak coffee. Filtered tap water hits the sweet spot.
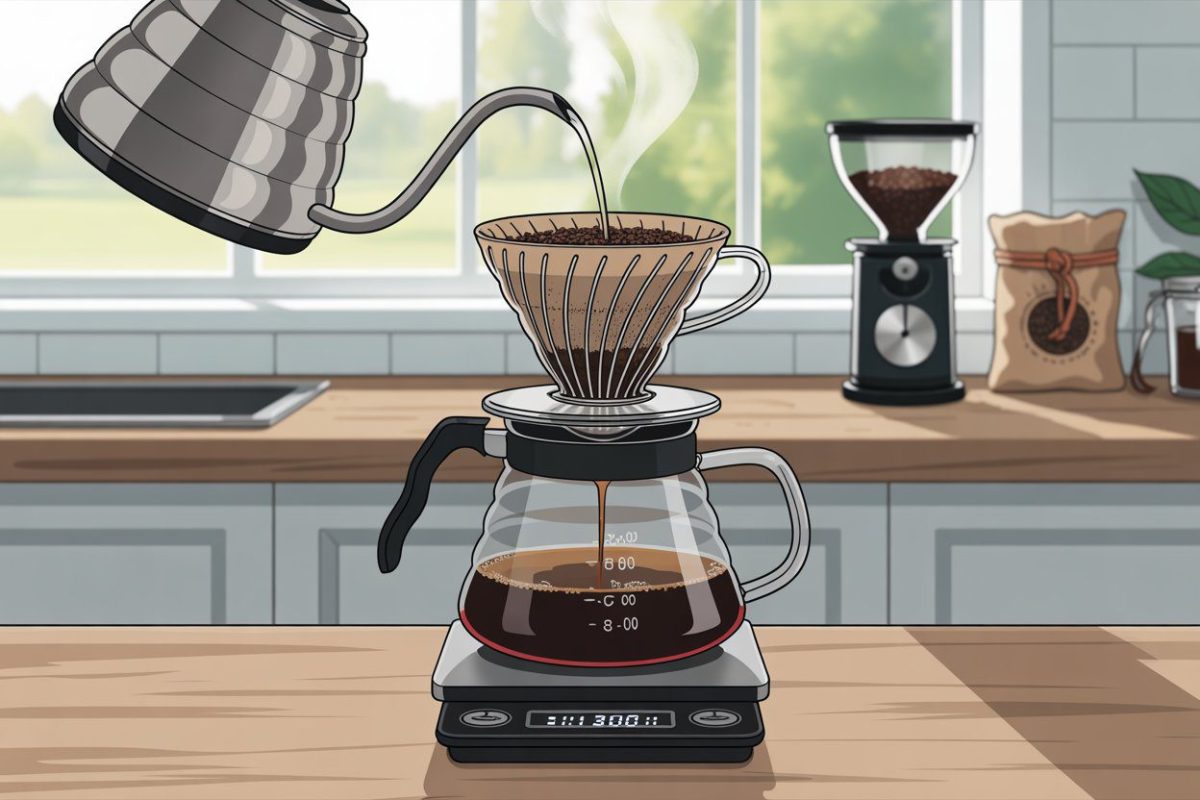
How To Make Pour Over Coffee: Complete Step-by-Step Guide
Here’s my pour-over coffee guide that works every morning. I use a 1:16 ratio – 25g coffee to 400g water. This makes about 13 oz of finished coffee.
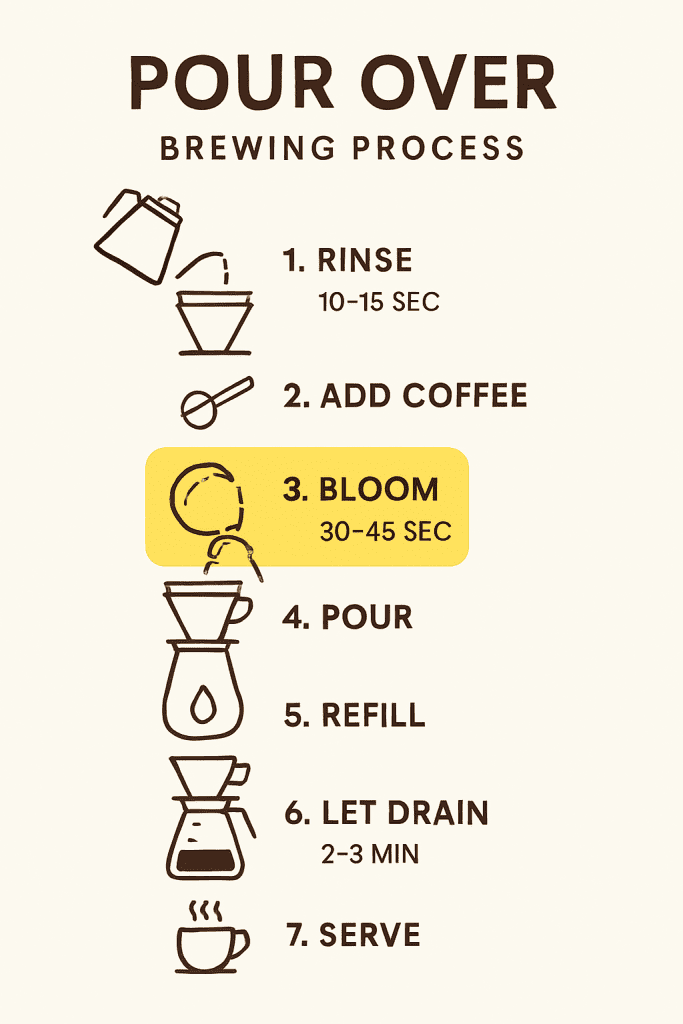
Step-by-step pour over coffee brewing timeline
The Perfect Pour Over Coffee Recipe:
Step 1: Prep Everything (1 minute)
Step 2: Rinse and Setup (30 seconds)
Step 3: The Bloom Phase (45 seconds)
This is where pour-over coffee magic happens. Pour 50g of water (2x the weight of the coffee grounds) over the grounds. Start in the center, spiral outward.
Watch for the “bloom” – the ground’s surface puffs up as CO2 escapes. Fresh beans bloom big—old beans barely bubble. Wait 30-45 seconds.
Step 4: First Pour (30 seconds)
At 45 seconds, start pouring again. Pour in slow circles from the center outward. Reach 150g total weight by 1:15.
Keep your gooseneck kettle 8-10 inches above the grounds. Steady height means even extraction.
Step 5: Second Pour (30 seconds)
À 1:30, pour 250 g au total—same circular motion. Never let the bed go completely dry.
Step 6: Final Pour (30 seconds)
At 2:00, pour the remaining water into 400g. Gentle circles, keep it steady.
Step 7: Wait and Enjoy (1-2 minutes)
Total brew time should hit 3:30-4:00 minutes. If it drains too fast, grind finer next time. Too slow? Grind coarser.
Pro tip: Give the dripper a gentle swirl after your final pour. This levels the coffee bed for even extraction.
Different Pour Over Methods
Not all coffee drippers work the same. Each needs slight technique adjustments.
V60 Technique:
- Medium-fine grind
- Faster flow needs steady pouring
- Great for bright, clean cups
Chemex Method:
Kalita Wave Approach:
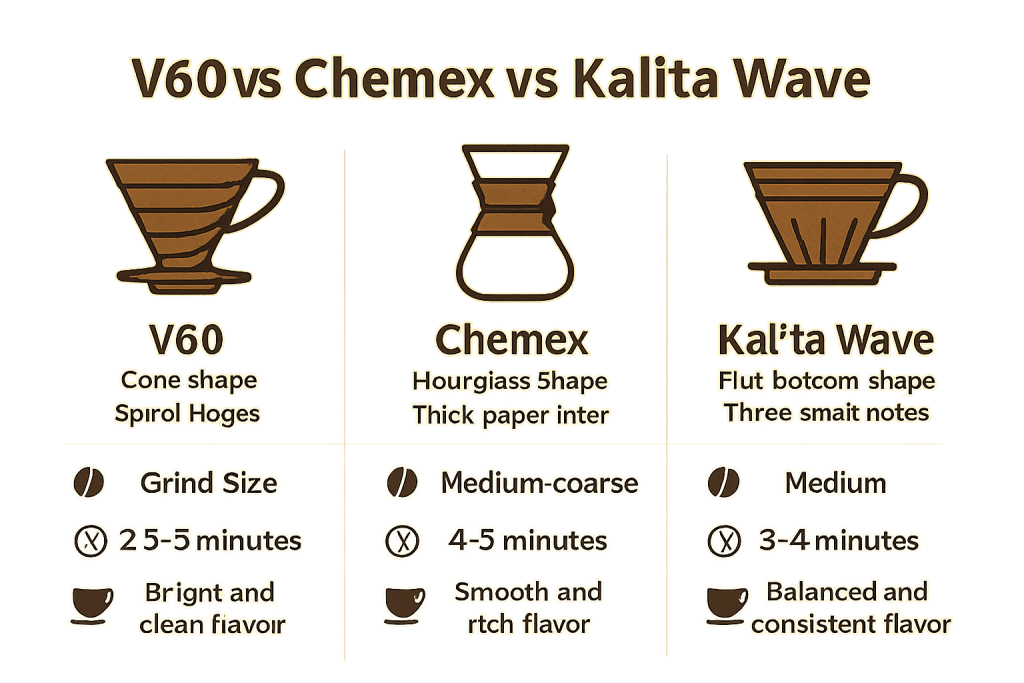
Comparing different pour over coffee drippers
I started with V60 because it’s cheap and teaches good technique. Once you nail V60, other drippers feel easy.
Standard Pour Over Mistakes to Avoid
I made every mistake in the book. Here are the big ones that ruined my morning coffee :
Equipment Mistakes:
Technique Mistakes:
Quick Fixes:
- Grind fresh, max 20 minutes before brewing
- Always rinse the filter first
- Pour slow and steady
- Use beans within 3 weeks of roast date
Troubleshooting Your Pour-Over Coffee
When your perfect pour-over coffee tastes off, here’s how to fix it:
Sour/Weak Coffee:
- Grind finer
- Use hotter water
- Pour slower
Bitter Coffee:
Brews Too Fast (under 2:30):
Brews Too Slow (over 4:30):
Keep notes in your phone. “Grind 7, too bitter, try 8 tomorrow.” This builds your pour-over coffee skills fast.
Advanced Pour Over Techniques
Once you master how to brew pour-over coffee at home, try these pro moves :
The Rao Spin: After final pour, spin your dripper gently. This creates an even coffee bed for uniform extraction.
Pulse Pouring: Instead of continuous pours, use 3-4 smaller pours. This prevents channeling and gives more control.
Agitation Control: Stir grounds with a spoon after bloom. Some say it improves extraction. I notice cleaner cups when I stir.
Recipe Scaling: My 1:16 ratio works for any size. Making 2 cups? Use 35g of coffee to 560g of water. Math stays the same.
Creating Your Home Coffee Setup
Making coffee at home doesn’t need a vast space. My DIY coffee station fits in 2 feet of counter space.
Essential Setup Tips:
I love my morning coffee routine now. It takes 6 minutes total, but feels like meditation—the ritual of grinding, blooming, and pouring starts my day right.
Morning Routine Tips:
Pour Over vs Other Brewing Methods
Pour-over coffee isn’t always the best choice. Here’s when to use what:
Pour Over Wins When:
Other Methods Work Better:
I use pour-over coffee for my morning cup and French Press when friends visit. Each method has its place.
Maintaining Your Equipment
A good home coffee setup needs regular care :
Daily Cleaning:
Weekly Deep Clean:
Bean Storage:
Frequently Asked Questions About Pour-Over Coffee
Q: How much should I spend on pour-over equipment? A: Start with $100-150 for basic setup. The grinder matters most – spend 40% of the budget there. You can upgrade over time.
Q: What’s the best coffee-to-water ratio for pour-over?
A: 1:16 ratio works great (25g coffee to 400g water). Try 1:15 for stronger or 1:17 for milder. Always weigh ingredients.
Q: Why does my pour-over taste sour? A: Sour means under-extraction. Try grinding finer, using hotter water, or pouring more slowly. Fresh beans help too.
Q: How long should the pour-over take? A: Target 3:30-4:00 minutes total. If under 2:30, grind finer. Over 4:30? Grind coarser.
Q: Can I use a regular kettle for pour-over?
A: A Gooseneck kettle gives much better control. Regular kettles pour too fast and unevenly. Worth the upgrade.
Q: What grind size for pour-over coffee? A: Medium-fine, like table salt. Adjust based on brew time – finer if too fast, coarser if too slow.
How to Make the Perfect Pour Over Coffee
Equipment
- 1 Pour over dripper (V60, Chemex, or Kalita Wave)
- 1 Gooseneck kettle
- 1 Coffee scale
- 1 Burr grinder
- 1 Coffee filters
- 1 Timer
- 1 Coffee mug or carafe
Ingredients
- 25 grams coffee beans medium roast
- 400 grams filtered water
- 50 grams water for filter rinsing
Instructions
- Heat water to 200°F. Grind 25g coffee beans to medium-fine. Place filter in dripper.
- Rinse filter with hot water. Discard water. Add ground coffee to dripper.
- Start timer. Pour 50g water in circles. Wait 30–45 seconds (bloom phase).
- At 45 sec, pour to 150g total by 1:15. Keep kettle 8–10 inches above.
- At 1:30, pour to 250g total. Use circular motion.
- At 2:00, pour to 400g total.
- Let drain completely (3:30–4:00 min total). Enjoy!
Notes
- Pour over coffee can be made using different drippers such as V60, Chemex, or Kalita Wave. The V60 method is great for beginners and offers lots of control.
- This recipe uses a 1:16 coffee-to-water ratio for a balanced, café-quality cup. For a stronger brew, use 1:15. For a milder cup, use 1:17.
- If your brew time is under 2:30 minutes, grind finer next time. If it’s over 4:30 minutes, grind coarser.
- Fresh beans (within 3 weeks of roast date) bloom better and taste noticeably better.
- Store leftover brewed coffee in the refrigerator for up to 2 days, but pour over coffee tastes best fresh.
Your Pour-Over Coffee Journey Starts Now
How to make pour over coffee changed my mornings completely. That first perfect cup three years ago started an obsession. Now I taste notes I never knew existed.
Your beginner’s guide to pour-over coffee journey starts with basic equipment and good beans. Master the fundamentals first – ratio, grind size, water temp. The fancy techniques come later.
Pour over coffee measurements stay consistent: 1:16 ratio, medium-fine grind, 200°F water. Brewing pour-over coffee tips that matter most: rinse the filter, bloom properly, pour in steady circles.
Start tomorrow morning. Your regular coffee maker can wait. Once you taste what manual brewing can do, there’s no going back. Trust me on this one.
Making coffee at home becomes an art form with pour-over coffee. Every cup teaches you something new. The ritual, the control, the incredible flavors – it’s all waiting for you.
Welcome to the world of pour-over coffee. Your taste buds will thank you.